| |
|
|
RESISTIVE TOUCH-PANELSDESCRIPTIONLibrary file #TP4WIRE.TDS provides support software for 4-wire resistive touch-panels. The touch-panel is divided into any number of touch pads, the division in both the X and Y directions being dynamically adjustable in software. For instance you might choose to split the panel into 15 x 12 touch pads at one moment and then only 2 x 1 pads if you want a yes/no reply from the user. The software returns 0 if the pad is left alone and a number ranging from 1 to the maximum current number of pads (e.g. 1 to 180) if a pad is touched. It imitates that provided for normal keypads so that a touch-panel can be readily substituted. Apart from use as a keypad, you can 'write' on the touch-panel using a stylus to show on an underlying LCD. Applications include signature input.
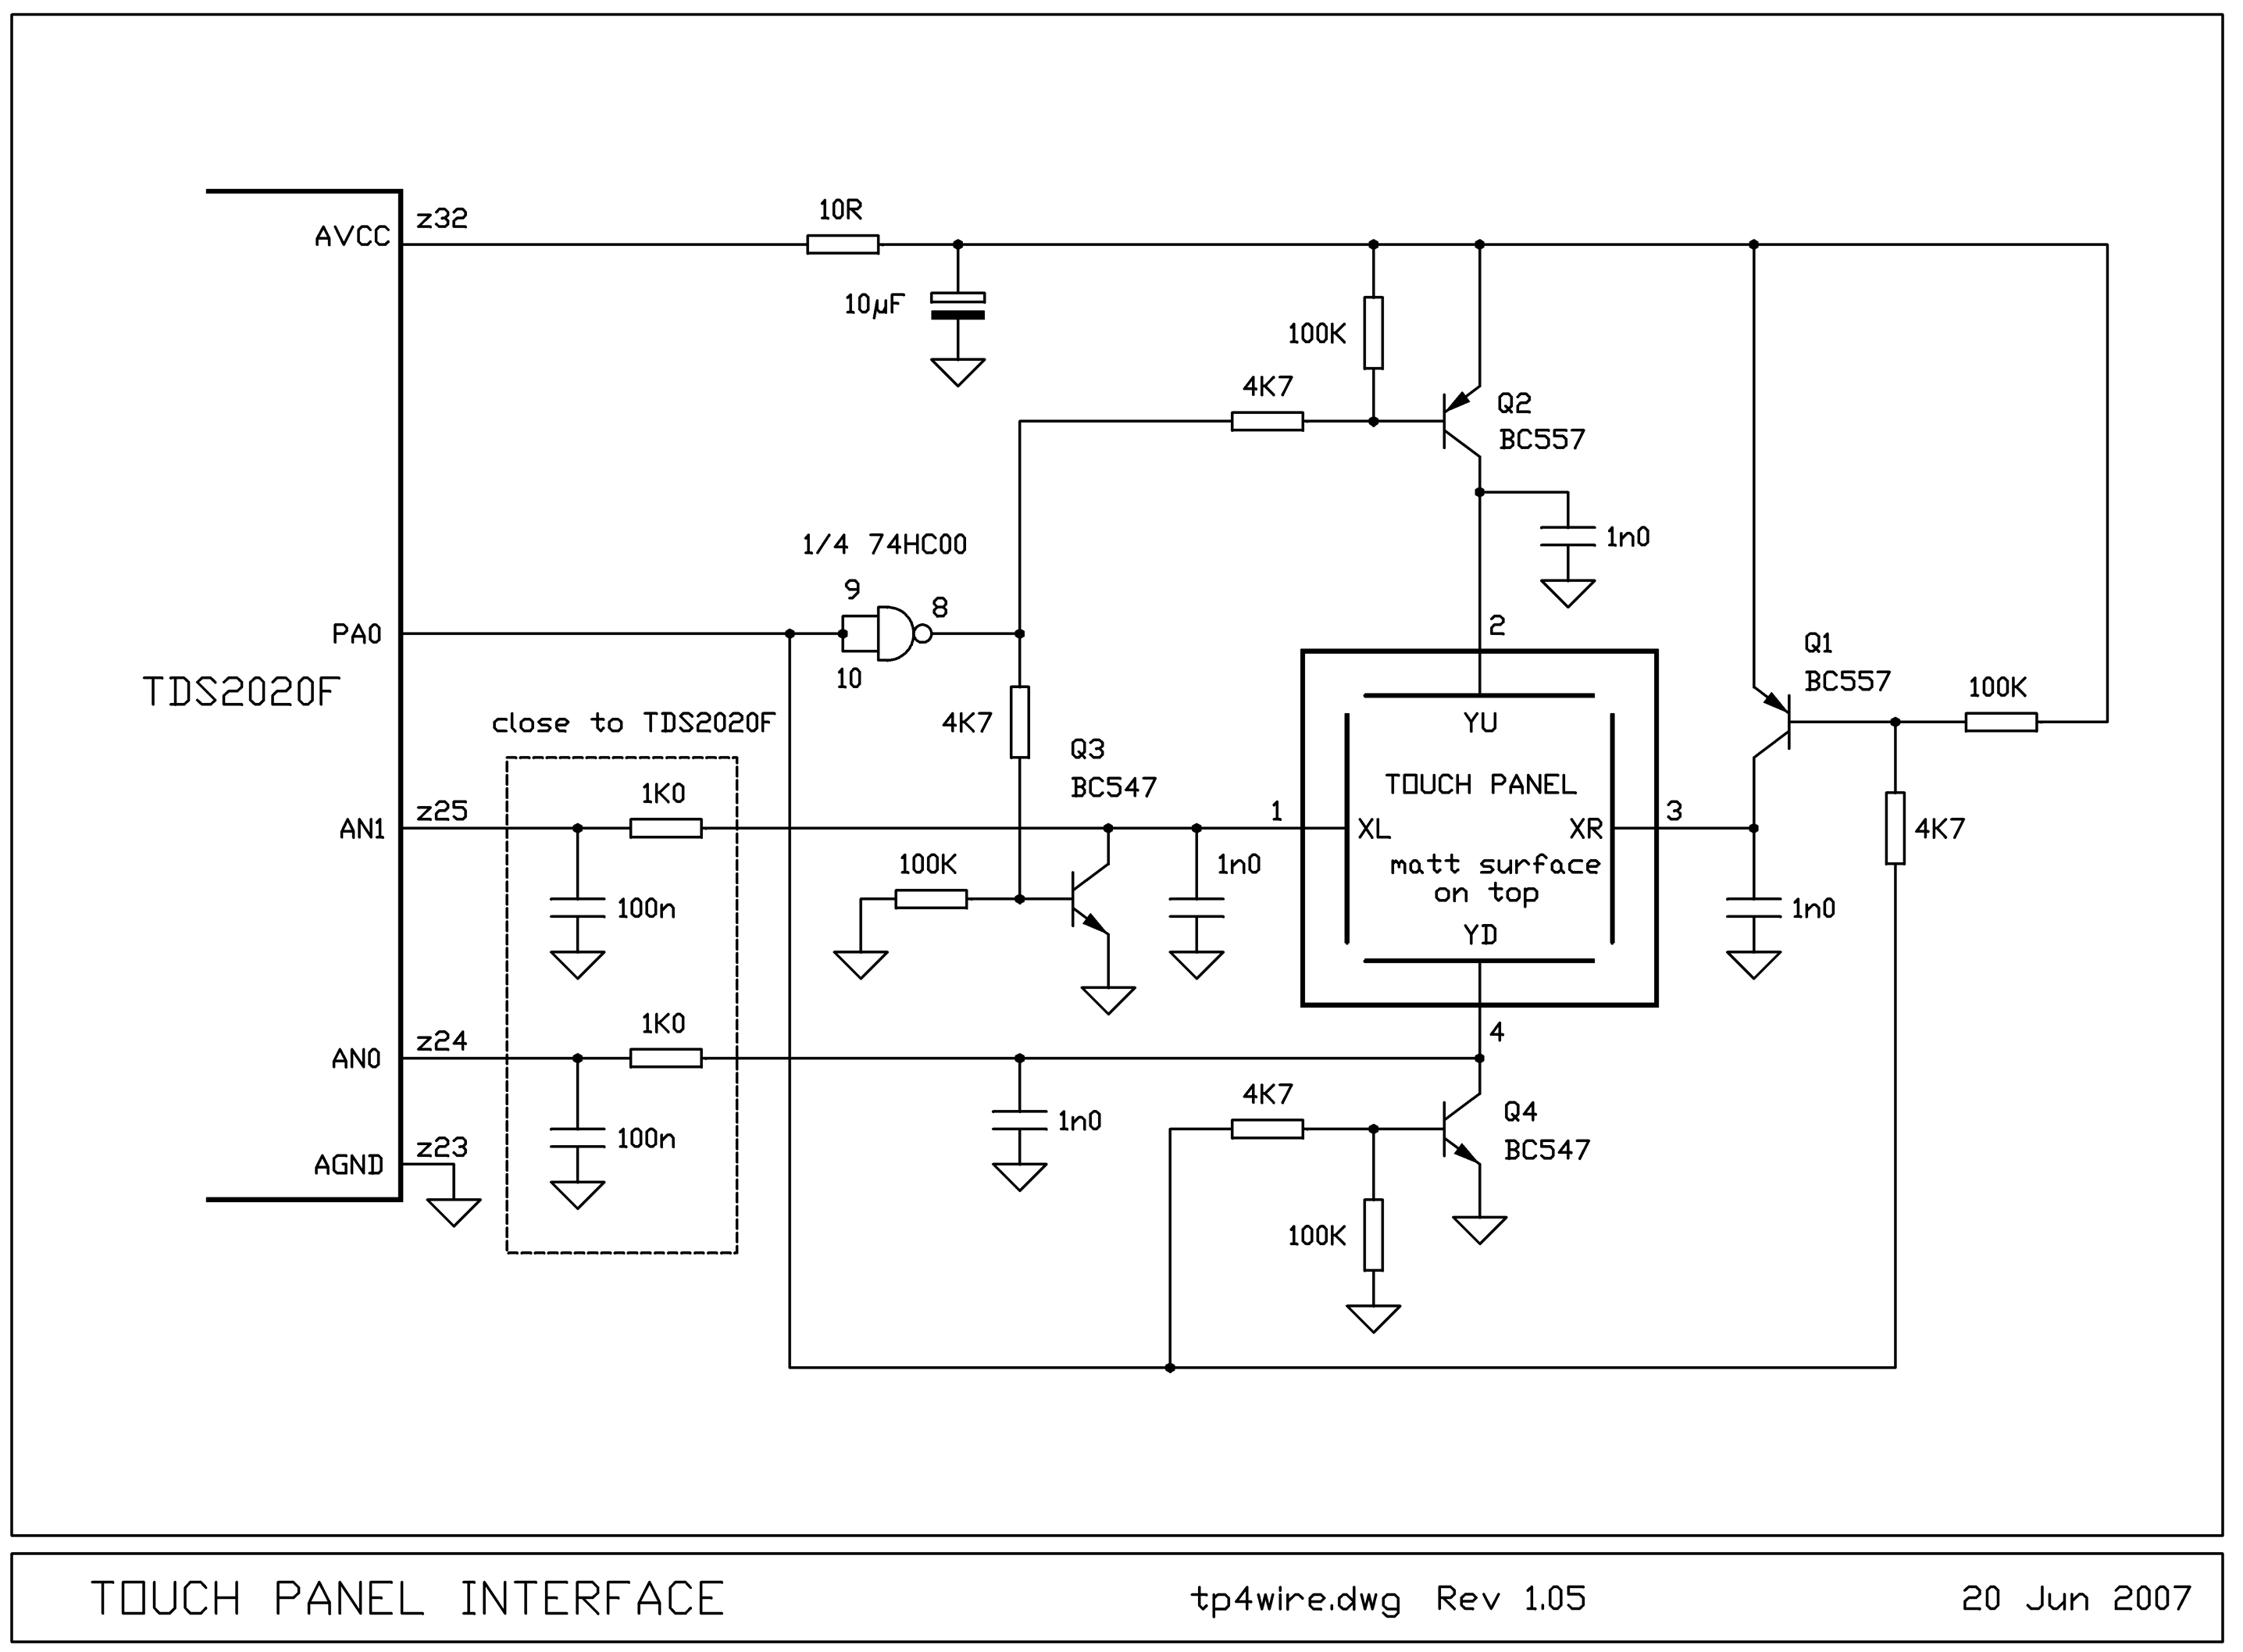
Touch panel interface TOUCH PANEL OPERATIONThese touch-panels fit over a graphics display and come in many sizes. The support software #TP4WIRE.TDS is suitable for 4-wire resistive touch-panels having resistive elements in both the X and Y directions. A voltage is applied across the X direction and, by potentiometer action, the location of the finger is read from the Y terminals as an analog voltage. The drive is then reversed and the X position is read. You need 2 PNP and 2 NPN transistors, together with one inverter gate and a few resistors and capacitors. A suitable circuit is shown here. The software was developed using an ATP057 5.7 inch touch screen from Carroll Touch (www.carrolltouch.com). RESOURCES USEDThis software uses
q Port A bit 0 as an output to choose X or Y position measurement q A to D channels 0 and 1 for the analog measurement.
Both these locations are readily changeable to other ports, request assistance if you need it. INSTRUCTIONS FOR USE1. Construct the circuit shown in file TP4WIRE.GIF on the CD in the directory \cd. 2. If
possible, also connect an LCD to the TDS2020F
to enable demonstration of the touchpad software. Alternatives are: 3. Edit the LIBRARY FILES section to choose the appropriate LCD support (if any). 4. Edit the TOUCHPAD PARAMETERS section. If you are initially unsure, leave the numbers as shown. 5. Compile file #TP4WIRE .TDS and type TOUCH-TEST return. When you touch the pad over the LCD a drawn square should follow your finger. 6. Stop the demonstration with any key on the PC and reset the number of allocated pads, for instance 8 6 PADS to give 48 pads, 8 in the X direction and 6 in the Y direction. 7. Type ALLPADS to show the locations of the pads 8. Type TOUCH-TEST again to run the demonstration with the new size of touch pad. 9. To use for signature input, type WRITE . Stop the demonstration with any key on the PC.
The easiest mistake is to get the X and Y inverted or mirrored when the transistor drives are connected. Also be sure the drive is being applied across the touchpad in X and Y directions, not for instance between an X plate and a Y plate. In an application, be sure to put TOUCH-INIT and G-INIT in the word executed at power-up to initialise the touchpad and LCD. |
 |
|